Flashing repair installation
Flashing repair installation: practical numbers, costs, and trade-offs, written independently.
Flashing repair installation: practical numbers, costs, and trade-offs, written independently. The guide below shows the numbers and the trade-offs.
- Typical range
- Varies by system and site
- First step
- Measure the space and confirm the load
- Professional help
- Recommended for structural or electrical work
Some links on this page are affiliate links.If you buy through them we may earn a commission at no extra cost to you. We do not accept payment for rankings. Read the full disclosure.
Flashing repair costs $220 to $600 as a standalone job on a straightforward roof, made up of $150 to $400 in labor, $50 to $150 in material, and $20 to $50 in sealant and supplies. The number is small because the job is small. The damage a failed flashing causes is not, which is why this is the repair to make before the ceiling stain gets worse.
What flashing is
Chimney flashing is the layered metal assembly at the joint between the chimney and the roof, built to shed water away from the masonry and onto the shingles.
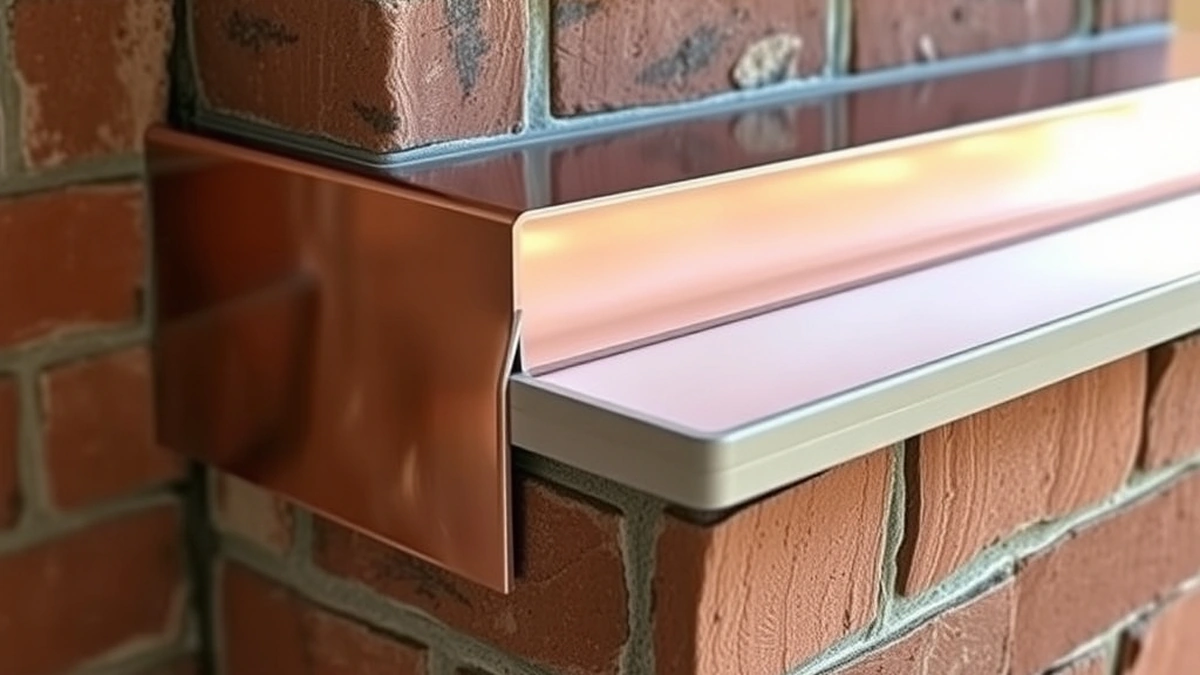
It is not one piece. A complete job has step flashing woven into the shingles along the sides, apron flashing across the downhill face, counterflashing cut into the masonry above the step flashing, and a cricket on the uphill side of a wide chimney to divert water around it. Sealant is a supplement, not a component.
The parts of a flashing job
| Component | Usual material | What it does |
|---|---|---|
| Step flashing | Galvanized or copper | Sits in each shingle course along the chimney side |
| Apron flashing | Galvanized or copper | Covers the downhill joint and laps onto the shingles |
| Counterflashing | Copper or stainless | Cut into the masonry and folded over the step flashing |
| Cricket | Framed and flashed | Diverts water around a chimney wider than 30 inches |
| Sealant | Polyurethane | Closes the counterflashing reglet, not the joint |
The counterflashing is the part most often missing on a repair. A crew that caulks the top edge of the step flashing instead of cutting a reglet and inserting metal has sealed the leak path rather than rebuilt it.
Step flashing vs counterflashing
Step flashing and counterflashing do different jobs, and confusing them is why so many repairs fail.
Step flashing is the lower layer. It is installed with the shingles, one piece per course, and it sheds water that runs down the roof. Counterflashing is the upper layer. It is attached to the chimney and folds down over the step flashing, so water running down the masonry cannot get behind it.
The two must overlap, and the overlap must be open at the bottom so water can escape. When the counterflashing is sealed tight to the step flashing, water trapped between them has nowhere to go and works its way into the roof deck. That is the mechanism behind most “repaired” flashing that leaks again the next winter.
What the job costs, with arithmetic
Labor at $150 to $400 plus material at $50 to $150 plus sealant and supplies at $20 to $50 gives the standalone range:
- Low: $150 + $50 + $20 = $220
- High: $400 + $150 + $50 = $600
Midpoint: ($220 + $600) ÷ 2 = $410.
If the flashing work is bundled with a cap, add the cap planning range of $150 to $600. A mid-range bundle is $410 + $375 = $785, where $375 is the cap midpoint of ($150 + $600) ÷ 2.
If the inspection finds a cracked crown as well, add $400 to $1,500. At midpoints that is $410 + $375 + $950 = $1,735. The flashing line is still the smallest of the three, which is the argument for fixing it first.
How the installation runs
- Strip the shingles back along the chimney sides to expose the old step flashing.
- Remove the old metal and inspect the roof deck and the sheathing for rot.
- Cut a reglet into the masonry, usually about an inch deep, and insert the new counterflashing.
- Install new step flashing one piece per shingle course, lapping each piece over the one below.
- Fit the apron flashing at the downhill face and build or refit the cricket on the uphill side.
- Seal the reglet, not the laps, then replace the shingles and test with a hose.
The hose test is the last step and the one to insist on. Water run at the flashing from the roof for several minutes should produce nothing inside.
Why caulk fails and metal works
Caulk is a flexible bond between two materials that move at different rates. Masonry moves with temperature and moisture, and a roof deck moves with load and season. The bond eventually breaks, usually within one or two winters, and the failure is invisible from the ground.
Metal works because it does not rely on adhesion. Step flashing and counterflashing shed water by gravity and overlap. The only sealant in a correct assembly is in the reglet, where it keeps wind-driven rain out of a slot that is already mechanically closed.
That is why a $220 repair with new metal outlasts a $150 repair with a tube of sealant. The cheap version is not a cheaper version of the same job.
When flashing repair becomes a roof job
Flashing repair stays small when the roof around the chimney is sound. It grows when the deck below is rotten, when the chimney sits in a valley, when the roof pitch is low enough that a cricket is required, or when the chimney is wide enough that the flashing spans more than one framing bay.
Those conditions push the job into roof repair pricing, and the flashing line becomes part of a larger invoice. The sign is what the crew finds when the shingles come up. A quote written before anything is opened should carry a contingency, and a contractor who refuses to quote the deck repair separately is a contractor to question.
What to check before the crew leaves
Look at the counterflashing where it enters the masonry. It should be a straight cut with metal visible, not a bead of caulk. Look at the downhill face for an apron flashing that laps onto the shingles rather than sitting under them. Look at the uphill side for a cricket if the chimney is wide.
Then run water. A hose at the flashing for five minutes is the only test that proves the joint, and it costs nothing but time.
For the diagnostic side, see chimney leak repair. For the repair listed on its own, see chimney flashing repair. For the cap that finishes the top of the assembly, see chimney cap installation, and for the wider menu, see chimney repair.
Frequently asked questions
What is the most important measurement?
Start with the ceiling or clearance number; it decides which systems can fit.
What does a typical project cost?
Costs vary by system and site access; the guide shows the line items and a planning range.
Can I install this myself?
Some tasks are DIY-friendly, but structural, electrical, and load-bearing work should be done by a licensed professional.
How long does installation take?
A simple setup is a weekend; a full build with electrical or structural work can take several weeks.
What should I check before buying?
Confirm dimensions, load ratings, and the manufacturer's installation requirements for your exact model.
Where can I find local help?
Ask a licensed contractor or installer who has worked with the same system and can inspect your site.
Sources
Some links are affiliate links.If you buy through them we may earn a commission at no extra cost to you. We do not accept payment for rankings. Read the full disclosure.